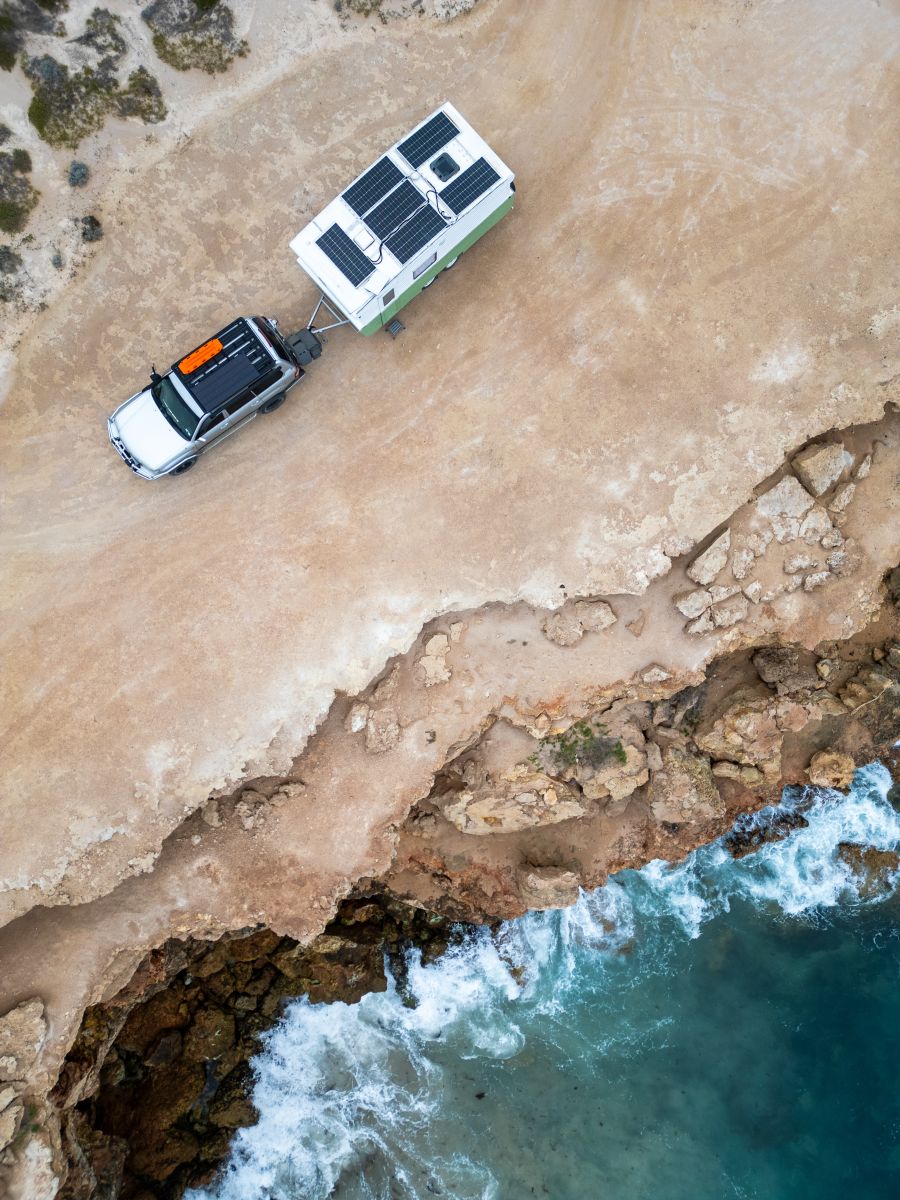
The demand for caravan solar panels in Australia is surging as more travellers embrace the freedom of off-grid adventures and remote locations, whilst seeking reliable power solutions. Solar panels are a cost-effective and environmentally friendly way to generate sustainable energy while giving you the freedom to travel anywhere without relying on caravan park power. By harnessing the sun’s energy, a complete caravan solar setup allows you to power your essential appliances, charge devices, and maintain comfort no matter how remote your destination. Unlike traditional generators, which can be noisy and require constant refueling, caravan solar panels in Australia operate silently, providing a peaceful and uninterrupted camping experience.
Whether you're a weekend camper or a full-time road warrior, understanding how to design a complete caravan solar setup is essential for maximising efficiency and independence. While many existing resources touch on different aspects of solar energy, they often fall short of providing a truly comprehensive breakdown of all the critical factors involved. This RV solar system guide is designed to bridge that gap by offering in-depth insights, expert recommendations, and practical advice tailored specifically for solar power for Australian caravans. From choosing the right panels and batteries to optimising system performance, we’ll cover everything you need to build an efficient and cost-effective off-grid caravan power system suited to the unique conditions of the Australian landscape.
Understanding Caravan Solar Systems
How does a solar system work? Well a solar power system for Australian caravans captures sunlight using solar panels, converts it into electrical energy, and stores it in batteries for later use. This electricity is then managed and distributed to power appliances and charge devices. Understanding how each component functions will help you build an optimised system that meets your energy needs.
Complete System Components: How Do They Work Together?
A complete caravan solar setup consists of several interconnected components that ensure efficient energy generation, storage, and distribution:
-
Solar Panels – Capture sunlight and generate electricity.
-
Solar Charge Controller – Regulates power flow to prevent battery overcharging.
-
Batteries – Store energy for use when sunlight is unavailable.
-
Inverter – Converts stored DC power into AC power for 240v appliances.
-
Wiring & Fuses – Ensure safe and efficient energy transfer between components.
-
Monitoring System – Provides real-time data on power generation, storage, and usage.
All these components work together to provide off-grid caravan power systems capable of running essential appliances like fridges and lights.
Components Breakdown
Types Of Solar Panels
-
Monocrystalline – Highest efficiency, durable, best for limited space.
-
Polycrystalline – More affordable but slightly lower efficiency.
-
Amorphous (Thin-film) – Lightweight, flexible, works better in low-light.
-
Semi-flexible – Bendable for curved surfaces but less efficient than rigid panels.
Wiring and Connections
Proper wiring is essential for safety and efficiency in an off-grid caravan power system.
Key Considerations:
-
Cable Sizing – Use the correct gauge to prevent power loss (thicker cables for longer distances).
-
Connection Types – Anderson plugs, MC4 connectors, terminal blocks for secure connections.
-
Fusing Requirements – Inline fuses prevent short circuits and protect equipment.
Monitoring Systems
A monitoring system helps track energy input, output, and battery status.
Options:
-
Battery Monitors – Show charge levels and power usage.
-
Solar Input Displays – Measure how much power is being generated.
-
App Connectivity – Bluetooth or WiFi-enabled monitoring for real-time data on mobile devices.

Assessing Your Power Needs
Before setting up a complete caravan solar system, it's crucial to determine your energy requirements. Every traveller has unique power needs depending on the appliances they use, how often they camp off-grid, and the climate conditions they encounter. By conducting a power audit, you can ensure your system is properly sized, preventing underpowered setups that lead to battery depletion or overpowered systems that add unnecessary cost and weight.
A power audit involves cataloging every electrical device in your caravan, noting its power consumption, and estimating daily usage. This data helps determine the required solar panel wattage, battery capacity, and inverter size for a solar power system for Australian caravans.
Calculating Electrical Appliances
-
List Every Electrical Appliance
-
Include lights, fridge, water pump, phone chargers, laptops, fans, heater, coffee maker, TV, and any other powered devices.
-
-
Determine Power Ratings
-
Check each device’s wattage (W), usually listed on the label or in the manual.
-
If power consumption is listed in amps (A), use this formula to convert:
-
Watts=Volts×Amps
(For a 12V system: Amps × 12 = Watts).
-
Estimate Daily Usage
-
Record average hours of use per day for each device.
-
Multiply wattage by daily hours to calculate watt-hours (Wh) per day:
-
Watt-hours per day=Watts×Hours used per day
Feeling overwhelmed? Don’t stress! We have put together a solar calculator to make this process super simple. Check it out here.
Day vs. Night Usage Considerations and Planning
Not all power consumption happens at the same time, and solar panels only generate electricity during daylight hours. It’s important to account for:
-
Daytime Loads: Appliances that run while the sun is shining, such as fridges, lights, and laptops, can be powered directly by solar panels.
-
Nighttime Loads: Devices like LED lights, entertainment systems, and heating/cooling need stored battery power since solar generation stops at night.
-
Battery Storage Planning: Ensuring your battery bank can store enough energy to power nighttime loads is critical for a reliable off-grid caravan power system.
Real-World Usage Scenarios
Different travellers have varying energy requirements. Below are typical RV solar system guide setups for different user profiles.
Weekend Camper
-
Short trips (1-3 days)
-
Basic appliances: fridge, lights, phone/laptop charging
-
Minimal heating/cooling needs
Recommended Setup:
-
Solar Panels: 200W–300W
-
Battery Bank: 100Ah AGM or 100Ah Lithium
-
Charge Controller: 20A MPPT or PWM
-
Inverter: 300W–500W for small appliances
-
Monitoring: Basic battery monitor
Why? A small solar setup is sufficient since weekend campers can recharge batteries at home or at powered sites between trips.
Full-Time Traveller
-
Long-term or permanent off-grid living
-
Higher energy demands (fridge, TV, fans, laptops, coffee machine)
-
Requires reliable year-round power
Recommended Setup:
-
Solar Panels: 600W–1200W (or more for larger setups)
-
Battery Bank: 200Ah–400Ah Lithium (LiFePO4 preferred)
-
Charge Controller: 40A–60A MPPT
-
Inverter: 2000W+ (pure sine wave for appliances)
-
Monitoring: Advanced system with Bluetooth app connectivity
Why? A full-time traveller needs a robust system to sustain daily power usage, even in cloudy weather, ensuring uninterrupted energy independence.
Seasonal Considerations
Solar power production varies throughout the year, so adjusting expectations and system size is crucial.
-
Summer: Long daylight hours provide maximum solar generation. Even smaller systems perform well.
-
Winter: Shorter days and cloudy conditions reduce solar output, requiring larger panels or extra battery storage to compensate.
-
Solution: Adding tiltable solar panels can improve winter efficiency by adjusting panel angles to capture more sunlight.
Considering Different Australian Climate Zones
Australia’s diverse climate affects solar power performance.
|
Region |
Avg Solar Hours |
Solar Performance Considerations |
System Adjustments |
|
Northern Australia (QLD, NT, WA) |
5.5 – 6.5 hours |
High solar output year-round, but cloudy wet season can reduce performance. |
Increase battery storage to compensate for the wet season. |
|
Southern Australia (VIC, SA, TAS) |
3 - 5 hours |
Winter generation drops significantly due to shorter days and cloudy weather. |
Install extra solar panels and larger battery banks. |
|
Central Australia (WA, NT, SA, QLD) |
6 -7 hours |
Excellent year-round sunshine but extreme heat can reduce battery efficiency. |
Use lithium batteries (heat-resistant), ensure good ventilation. |
|
Coastal Regions (NSW, QLD, WA, SA) |
4.5 - 6 hours |
Moderate solar performance, occasional overcast days. |
Standard solar setup with monitoring system for adjustments. |
Selecting the Right Solar Panel System
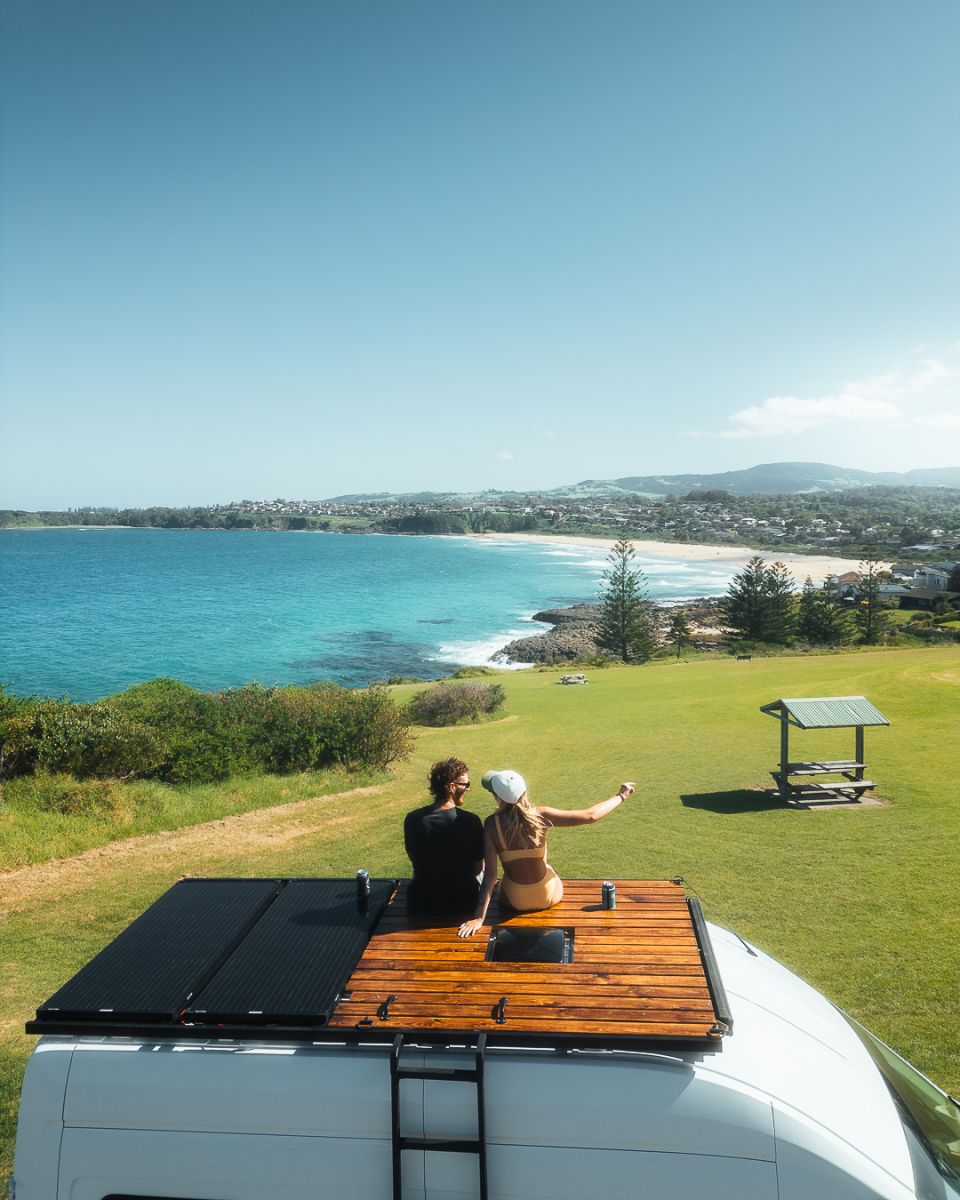
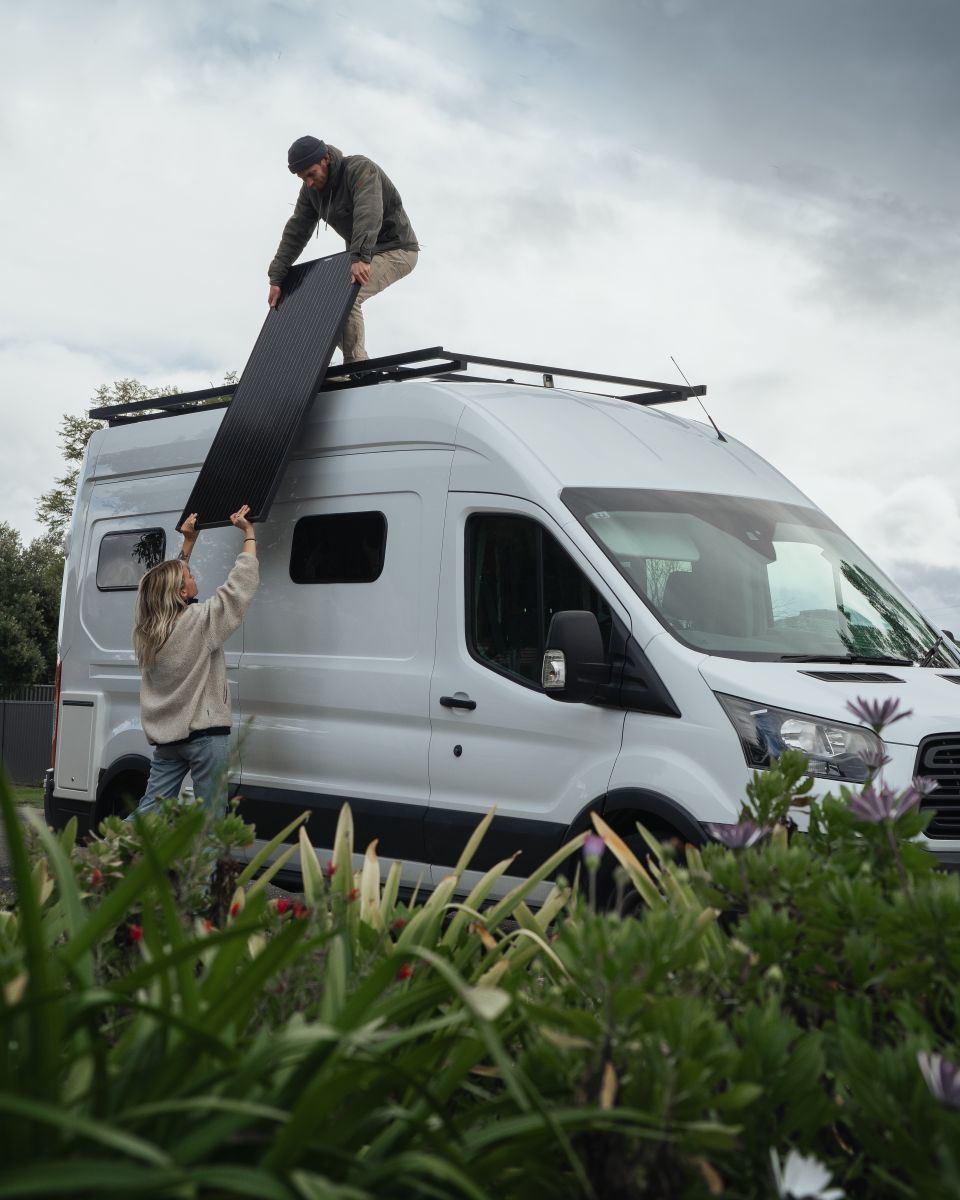
Choosing the right solar power system for Australian caravans depends on your travel style, energy needs, and space constraints. The primary decision is whether to install fixed (roof-mounted) panels, use portable solar panels, or adopt a hybrid approach combining both. Each option has its own advantages and trade-offs, so it's essential to evaluate them based on efficiency, convenience, and flexibility.
Fixed vs. Portable Systems
Advantages:
-
Always Charging – Panels generate power while driving or parked.
-
Space-Saving – No need to store or set up panels each time you camp.
-
Weatherproof & Secure – Permanently installed, reducing risk of theft or damage.
-
Less Setup Time – No manual positioning required; energy collection is automatic.
Disadvantages:
-
Fixed Positioning – Cannot be easily adjusted for optimal sunlight angles.
-
Shading Issues – Even a small amount of shade from a tree or an antenna can reduce efficiency.
-
Limited Roof Space – Competing for space with air conditioners, vents, and satellite dishes.
-
Difficult to Upgrade – Expanding the system may require major modifications.
.jpg)
Advantages:
-
Adjustable Positioning – Can be angled to maximize sunlight exposure throughout the day.
-
Avoid Shading Issues – Can be placed in direct sunlight even if the caravan is parked in the shade.
-
Expandable – Easily add more panels as energy needs grow.
-
Ideal for Small Vans & Camper Trailers – Great for travellers with limited roof space.
Disadvantages:
-
Setup Required – Needs to be deployed and packed away each time.
-
Takes Up Storage Space – Needs a secure place inside the caravan or tow vehicle.
-
Prone to Theft or Damage – Portable panels can be left unattended at campgrounds.

Hybrid Approaches for Maximum Flexibility
A hybrid caravan solar system combines both roof-mounted and portable panels to maximise flexibility.
-
Roof-Mounted Panels: Provide continuous charging while driving and parked.
-
Portable Panels: Can be used when extra power is needed, or when the caravan is parked in the shade.
-
Ideal for: Full-time travellers, those with high energy needs, or anyone who camps in varying conditions.
Space-Saving Innovations for Limited Roof Area
If roof space is limited, consider these innovations:
-
High-Efficiency Monocrystalline Panels – Generate more power per square meter.
-
Semi-Flexible Solar Panels – Can be installed on curved surfaces.
-
Solar Roof Tiles or Wraps – Integrate solar cells into roof coatings for better space utilization.
-
Stacked or Sliding Panel Mounts – Allow multiple panels to be deployed when stationary.
-
Tilt & Swivel Mounts – Help maximize sun exposure in winter or shaded conditions
Installing a Caravan Solar System
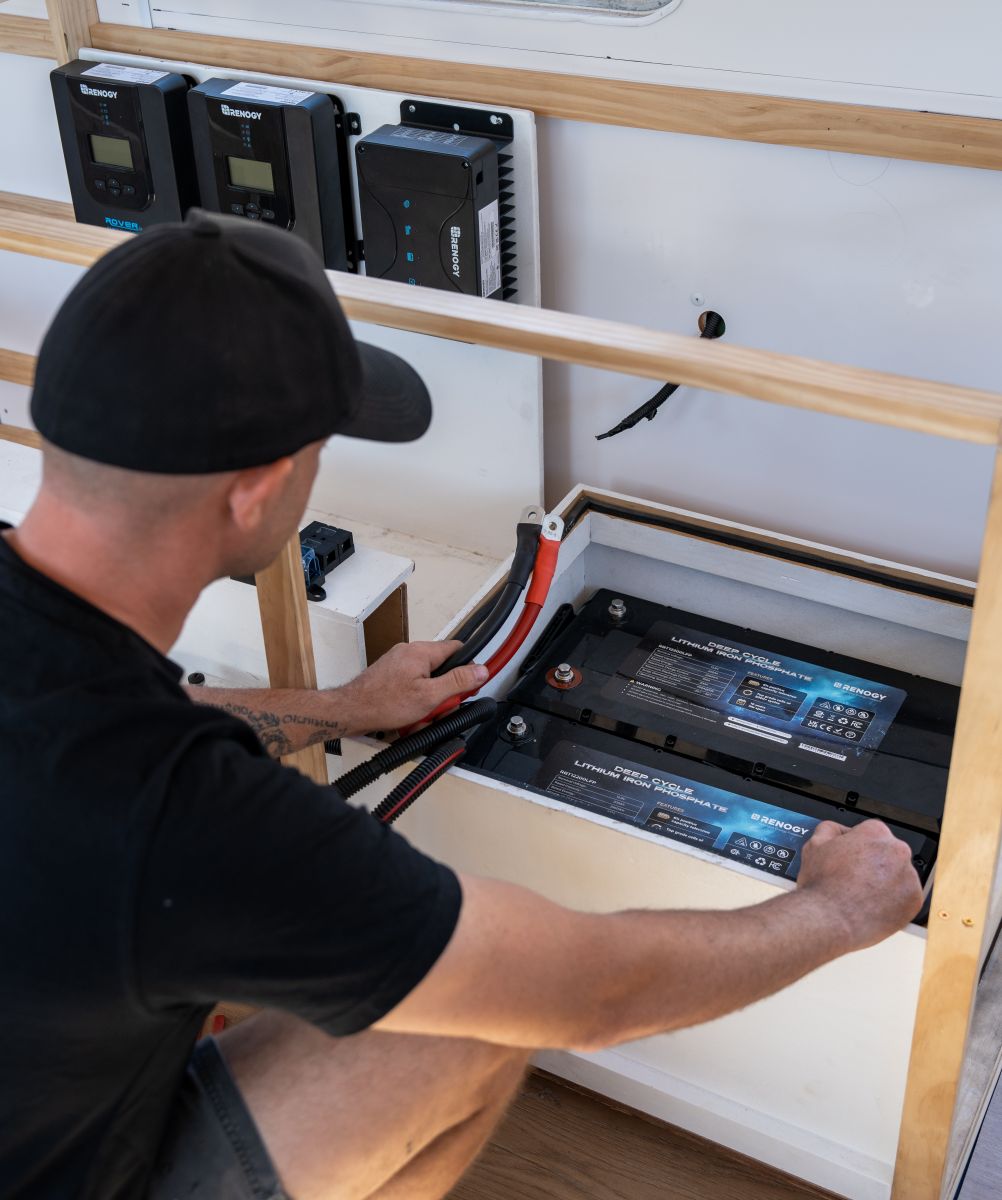
Installing a solar power system for Australian caravans can be done as a DIY project or by a professional installer. Whether you prefer to tackle the setup yourself or hire an expert, it’s crucial to ensure the system is correctly installed for maximum efficiency, safety, and compliance with Australian standards.
DIY Installation
If you’re comfortable with basic electrical work and have the right tools, a DIY installation can save money while giving you a deeper understanding of how your system works. However, improper installation can lead to power inefficiencies, system failures, or even fire hazards, so following best practices is essential.
Tools and Materials Required
Tools:
-
Cordless drill and drill bits
-
Screwdrivers (Phillips & flathead)
-
Wire strippers and crimpers
-
Multimeter (for voltage and continuity checks)
-
Heat gun (for heat-shrink tubing)
-
Wrench set (for securing battery terminals)
-
Measuring tape and pencil (for accurate panel placement)
Materials:
-
Solar panels (monocrystalline or polycrystalline)
-
Charge controller (MPPT or PWM)
-
Deep cycle batteries (Lithium, AGM, or Gel)
-
Inverter (pure sine wave recommended for sensitive electronics)
-
Solar mounting brackets or tilt brackets
-
MC4 connectors and extension cables
-
Fuses, circuit breakers, and busbars
-
Heat shrink tubing and cable ties
-
Sealant (to waterproof roof mounting points)
Step-by-Step Mounting Instructions
1. Positioning the Solar Panels
-
Identify the best location on your caravan roof or select an area for portable panels.
-
Ensure no shading from air vents, antennas, or roof racks.
-
If using tiltable mounts, angle them for optimal sunlight exposure.
2. Mounting the Panels
-
Mark drill points and pre-drill pilot holes for brackets.
-
Use stainless steel screws and apply sealant around drill holes to prevent leaks.
-
Securely fasten mounting brackets and attach the panels.
3. Connecting the Panels to the Charge Controller
-
Use MC4 connectors to link the solar panels.
-
Route solar cables through a waterproof entry gland into the caravan.
-
Connect positive (+) and negative (–) cables to the solar input terminals on the charge controller.
4. Wiring the Battery Bank
-
Connect the charge controller’s battery terminals to the battery bank:
-
Red cable to positive (+)
-
Black cable to negative (–)
-
-
Use fuses or circuit breakers for protection.
5. Connecting the Inverter (Optional)
-
If powering 240V appliances, connect the battery bank to the inverter using heavy-duty cables.
-
Ensure the inverter is securely mounted and properly ventilated.
6. Testing the System
-
Use a multimeter to verify correct voltages.
-
Check the charge controller LCD display or app for power readings.
-
Run test loads (lights, fridge, etc.) to confirm system functionality.
For a full Solar Panel System installation, check out this step by step from Jack & Megan:
Parallel or Series Installation?
So what’s the difference?
Parallel Solar Connections = Increases Amperage (current) and Voltage remains the same.
Series Solar Connections = Increases voltage but Amperage (current) remains the same.
Series - Connecting your solar array in series offers several advantages. Firstly, it allows the use of a smaller gauge wire to deliver the same amount of power to the charge controller, resulting in cost savings and reduced losses due to resistance.
However, there are also some disadvantages to consider. One concern is that having many panels in series can lead to a higher voltage, which may be less safe than operating at a lower voltage. It is crucial to check the input voltage tolerance of your solar charge controller when connecting multiple panels in series, as this will increase the overall output voltage.
To address this, it is recommended to use a Maximum Power Point Tracking (MPPT) solar regulator when opting for a series connection, as a Pulse Width Modulation (PWM) controller may not be as effective. Fortunately, most modern solar controllers are now equipped with MPPT technology.
Another drawback is the issue of partial shading. If one panel in a series connection becomes partially shaded, it can result in a reduction of output power across the entire solar array.array.
Parallel - The preferred choice among most of our customers is to connect panels in parallel, especially when dealing with partially shaded conditions as they perform better in such scenarios. However, a drawback of this setup is that it requires the use of a heavier gauge cable to minimise losses caused by resistance.
Maintaining a lower voltage in parallel connections offers the flexibility of choosing either a PWM or MPPT controller. Nevertheless, it's worth noting that in today's market, most reputable controllers are equipped with MPPT technology.
Wiring Diagrams and Connection Guidelines
Below is a basic caravan solar system wiring configuration:
Solar Panel → Charge Controller → Battery Bank → Inverter → 12V/240V Appliances
Key Wiring Guidelines:
-
Use the correct cable gauge to prevent voltage drop.
-
Always install a fuse between the battery and charge controller.
-
MC4 connectors should be properly crimped and waterproofed.
-
Battery terminals must be tight to avoid power loss.
-
Label cables for easier troubleshooting.
Safety Precautions and Regulatory Considerations
-
Disconnect the battery before working on any wiring.
-
Wear insulated gloves when handling live wires.
-
Avoid loose or exposed wiring, which can cause shorts.
-
Use only Australian-compliant components (AS/NZS 5033 for solar installations).
-
Check weight limits if mounting heavy panels on the roof.
When To Choose Professional Installation
While DIY installation is rewarding, some situations call for professional installation. A certified installer ensures compliance with Australian standards, warranty requirements, and optimal system performance.
Consider hiring an expert if:
-
You lack electrical experience or are uncomfortable working with 12V and 240V systems.
-
Your system includes complex wiring (e.g., large battery banks, multiple solar inputs).
-
You need a custom mounting solution for limited roof space.
-
You want to ensure compliance with Australian regulations.
Australian Certification Requirements and Standards
All caravan solar installations in Australia must comply with national electrical safety laws. Key standards include:
AS/NZS 5033: Covers photovoltaic (PV) panel installations.
AS/NZS 3001: Specifies electrical wiring rules for RVs and motorhomes.
AS/NZS 4763: Governs inverters used in caravans and off-grid systems.
CEC Accreditation: Required for grid-connected solar, but recommended for off-grid setups.
Maximising System Performance
A well-designed off-grid caravan power system can provide reliable energy for years, but to get the best performance, you need to optimise panel placement, monitor efficiency, and follow a regular maintenance schedule.
Positioning and Orientation
The placement of caravan solar panels in Australia significantly affects their energy output. Ensuring they are positioned correctly can maximise solar generation and prevent power shortages.
Optimal Angle and Direction for Fixed Panels
Direction (North is Best)
-
In Australia, solar panels should face north for the highest year-round energy production.
-
If your caravan is parked east-west, you can use adjustable tilting brackets to angle panels toward the sun.
Angle (Adjust for Seasonality)
-
The ideal tilt angle depends on your location and the time of year
-
Fixed flat panels will still generate power, but tilting them slightly improves efficiency.
Portable Panel Positioning
-
Move portable panels every few hours to follow the sun.
-
Use an adjustable stand to tilt them at the ideal angle.
Shade Management Strategies
Shading is a major cause of reduced solar efficiency. Even a small amount of shade on a panel can reduce energy output by 30 to 50 percent.
Avoid Common Shade Sources
-
Park away from trees, buildings, or other RVs.
-
Watch out for shading from roof accessories such as antennas or air conditioners.
Use Parallel Wiring for Multiple Panels
-
Parallel wiring ensures that shaded panels don’t affect the entire system.
-
Series wiring increases voltage but is more sensitive to shading.
Hybrid System Approach
-
If using fixed panels, carry a portable panel to place in direct sunlight when needed.
.jpg)
Maintenance and Troubleshooting
A well-maintained solar system operates more efficiently and lasts longer. Regular cleaning, inspections, and preventative care will keep your system in top shape.
Cleaning Protocols for Maximum Efficiency
Regularly cleaning your solar panels helps maintain efficiency, as dust, bird droppings, salt, and pollen can reduce performance by 10 to 20 percent. In dusty areas, clean them every one to two months, as well as before and after long trips or heavy rain. Use a soft brush or microfiber cloth to prevent scratches, rinse with deionized water to avoid streaks, and apply a mild soap solution without harsh chemicals. Drying with a clean towel helps prevent water spots. Avoid pressure washers, abrasive pads, and harsh detergents, as they can damage the panels or degrade protective coatings.
Regular Maintenance
Regular maintenance ensures your solar system runs efficiently. Each month, check panels for dirt, cracks, or discoloration and inspect mounting brackets for looseness or corrosion. Every three months, examine wiring connections for corrosion or damage and tighten any loose screws. Every three to six months, monitor battery voltage and charge cycles, checking electrolyte levels in AGM or gel batteries and ensuring the Battery Management System (BMS) in lithium batteries is functioning properly. Every six months, verify that the charge controller is working without errors and test the inverter output to ensure stable 240V power.
Common Problems and Solutions
|
Problem |
Cause |
Solution |
|
Low Power Output |
Dirty panels, shading, or faulty wiring |
Clean panels, reposition, and check connections |
|
Battery Not Charging |
Dead battery, faulty charge controller, or loose cables |
Test battery voltage, inspect wiring, replace controller if needed |
|
Inverter Not Working |
Overload, bad connections, or faulty unit |
Reduce load, check fuses, or replace inverter |
|
System Overheating |
Poor ventilation around batteries or controller |
Improve airflow, relocate components if necessary |
|
App Not Connecting |
Bluetooth or WiFi issues |
Restart app, check firmware updates, reconnect device |
Guide To Buying Caravan Solar Systems
When selecting a solar system for your caravan, the right choice depends on your budget, usage needs, and the level of off-grid independence you're seeking. Here's a breakdown of entry-level and premium system recommendations.
Entry-Level System Recommendations
For those new to caravan solar systems or looking for a simple setup, an entry-level system provides basic power to charge devices and run small appliances without breaking the bank.
Recommended Components:
-
Solar Panels:
-
100W Monocrystalline Panels (high efficiency, affordable price)
-
Check out the: Renogy 100W Monocrystalline Solar Panel
-
-
Charge Controller:
-
PWM (Pulse Width Modulation) charge controller, a more budget-friendly option for smaller systems.
-
Check out the: Renogy 10A PWM Solar Charge Controller
-
-
Battery:
-
AGM Battery (affordable and reliable for small power needs)
-
Check out the: Enerdrive BTEC 100Ah Lithium Battery
-
-
Inverter:
-
Modified Sine Wave Inverter for basic power needs like charging small electronics.
-
Check out the: Renogy 2000W Pure Sine Wave Inverter
-
Premium System Recommendations
For full-time travellers or those who want the ultimate in off-grid living, a premium system offers the best efficiency, performance, and longevity for large appliances and high power needs.
Recommended Components:
-
Solar Panels:
-
400W Monocrystalline Panels for high efficiency and maximum output.
-
Check out the: 2 x 200W Enerdrive Monocrystalline Fixed Panels
-
-
Charge Controller:
-
High-efficiency MPPT controllers for optimal charging, even in partial sunlight.
-
Check out the: Victron Energy SmartSolar MPPT 150/100
-
-
Battery:
-
High-capacity Lithium Iron Phosphate (LiFePO4) batteries for reliable power in all conditions, long life cycles, and deep discharges.
-
Check out the: Enerdrive BTEC 300Ah Lithium Battery
-
-
Inverter:
-
Pure Sine Wave Inverter capable of handling high loads for appliances like air conditioners or microwaves.
-
Check out the: Renogy 3000W Inverter Charger
-
Caravan Solar Panels FAQs:
Why should I install a solar system on my caravan?
Installing a solar power system allows you to generate free, renewable energy while traveling, reducing your reliance on caravan park power. It provides off-grid independence, enabling you to camp anywhere without worrying about running out of electricity.
How much solar power do I need for my caravan?
The amount of solar power you need depends on your energy consumption. A typical setup includes 200–400W of solar panels and a 100Ah–200Ah lithium battery for running essentials like lights, a fridge, and small appliances.
Can I run my air conditioner on solar power?
Yes, but air conditioners have high energy demands. Running one off solar alone requires large battery storage (at least 300Ah lithium), a powerful inverter (2000W+ Pure Sine Wave), and at least 800–1200W of solar panels. Many travellers use a hybrid approach, combining solar with a generator for heavy loads.
How do I position my solar panels for the best performance?
For fixed panels, mount them flat or tilted slightly north in Australia for maximum efficiency. Portable panels should be angled at 30–45 degrees and adjusted throughout the day to follow the sun.
Caravan solar panels are a game-changer for anyone who loves the freedom of the open road. With the right setup, you can enjoy off-grid adventures without worrying about running out of power. Whether you’re a weekend camper or a full-time traveller, a well-designed solar system keeps your fridge running, your lights on, and your devices charged—all without needing to plug in at a caravan park. Plus, it’s a clean, cost-effective way to explore Australia while reducing your reliance on traditional power sources. With a little planning and maintenance, your solar setup will keep you powered up for years to come!
If you require support or have any questions please feel free to contact one of our friendly staff at Caravan RV Camping on 1800 787 278 or www.caravanrvcamping.com
-
DISCLAIMER* Please note, this advice is general in nature and we strongly recommend consulting the product manual and where relevant, a professional installer.
Comments (2)
Solar set up
Hi all, I have done some research and for our caravan build, 22.5ft, I am certain on 2 X 240amp lithium batteries, leaving room for a third, and 660w/880w solar on roof with a 220w plug in portable. 13mm cable from the car charger and wired to the start battery. What I'm not sure about is the BMS and dc/dc charger. Basically the brains of it all. I herd about wiring the fridge on a separate circuit and running 13mm cable to the start battery. I also want the solar to charge at the same time, as in extra, to the car when running. Can you suggest the correct equipment needed, thanksBy: Brent Holt on 02 February 2023
www.caravanrvcamping.com.au Response
In order to have the solar charge simultaneously, then you would want to run a separate solar regulator for the panels on the roof. You can purchase a DC2DC charger that also has an MPPT solar reg, and this solar reg might be a good one to use for your portable 220W panel. The Enerdrive DCDC 40A charger is a good option for this. In order to size up your regulator, can you please advise the voltage of your panels and how you plan to wire them. Assuming it is a 12V set up, the panels probably around 18 VOC and connected in parallel, so a Victron MPPT 30 - 50A regular would be a good option.